6 Best Questions to Think About Before starting a Popcorn Ceiling Removal Project in Melbourne, FL
Removing a popcorn ceiling can be an intimidating task for any homeowner, but it doesn't have to be. Knowing the dos and don'ts of popcorn ceiling removal is essential for achieving a smooth and successful result. From choosing the right tools and materials to understanding the potential hazards involved, there are many things to consider when removing a popcorn ceiling from your home. In this article, we'll discuss some key points to keep in mind so you can tackle your popcorn ceiling removal project with confidence.
1. Is removing popcorn ceiling worth it?
Popcorn ceiling removal is a common home improvement project many homeowners consider, but is it worth the effort? While it's true that popcorn ceilings were popular in the 1970s and early '80s in Melbourne, FL when they were first introduced, today’s trends lean toward simpler, more modern-looking ceilings. Removing a popcorn ceiling requires some skill and patience but can bring dramatic visual results for your home. In this guide, we’ll explore the pros and cons of popcorn ceiling removal so you can determine if the effort is worth the result.
Popcorn ceilings are made up of a layer of textured paint with an acrylic or styrofoam base. This texture was designed to hide imperfections in drywall, but over time it has become dated and unattractive in many homes. If you're considering removing your popcorn ceiling, there are several important factors to keep in mind.
First and foremost, consider the potential risks involved with popcorn ceiling removal. Asbestos was used as an insulation material in some older homes which could be present in any old texture material on your ceiling. If this is the case, then it's best to leave removal to professionals who will ensure safe disposal methods are followed. Always test for asbestos before tackling this project yourself!
2. How much does removing popcorn ceiling increase value in Melbourne, FL?
Removing popcorn ceilings is becoming increasingly popular among homeowners looking to update their home’s aesthetic. On top of the improved look, one question that often comes up is how much will a popcorn ceiling removal project increase your home's value? The truth is it depends on a variety of factors, but on average, removing popcorn ceilings can add between 1-3% to a home's overall sale price.
To understand if a popcorn ceiling removal project might be worth it for you, you'll want to consider several things. First, assess the condition of the existing texture material on your ceiling. If it has become discolored over time or is full of holes from nails and screws, then it might be worth removing in order to make your home more appealing for potential buyers.
Then consider the cost associated with this project as well as any potential risks involved such as asbestos or lead paint. Depending on the size of your area and condition of your current textures, removing popcorn ceilings may cost anywhere from $1.50 - $5 per square foot depending on labor costs in your area. You will also need to factor in any additional services such as painting or patching after the material has been removed.
Considering all of these factors can help you determine whether removing your popcorn ceiling will be worth it in terms of resale value. At best, this project could slightly raise your homes value while making a more attractive living space for you and potential buyers alike!
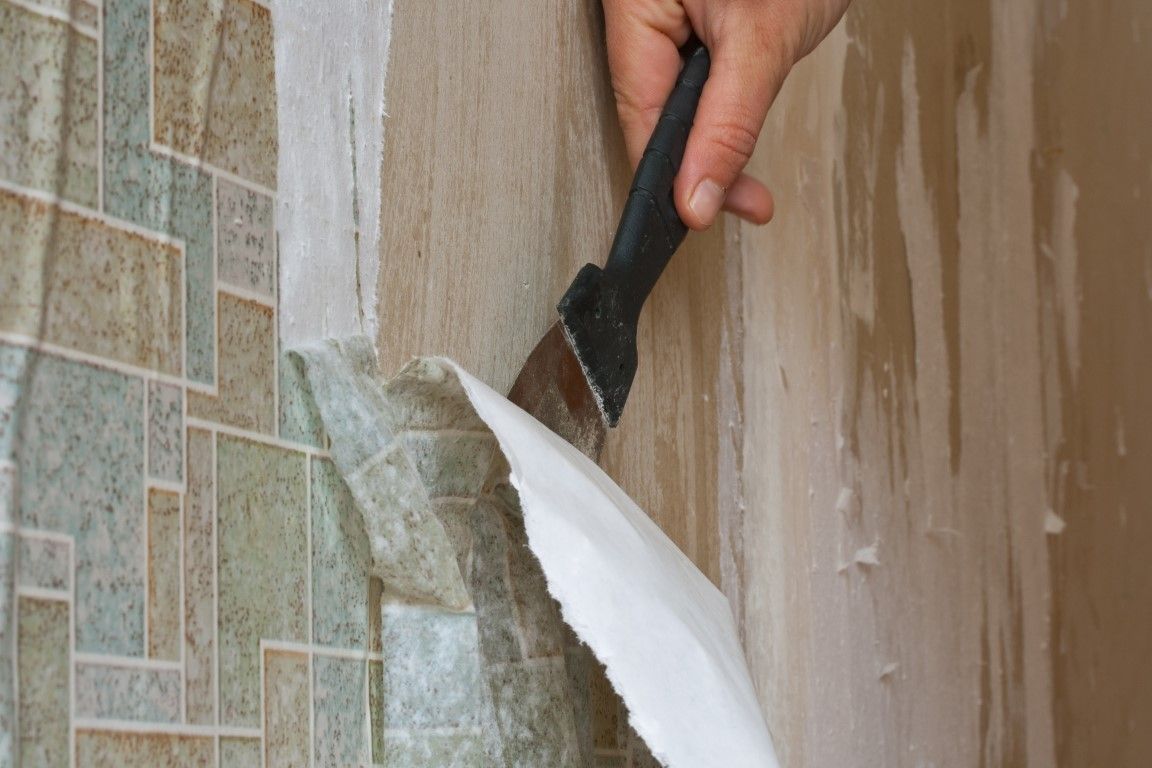
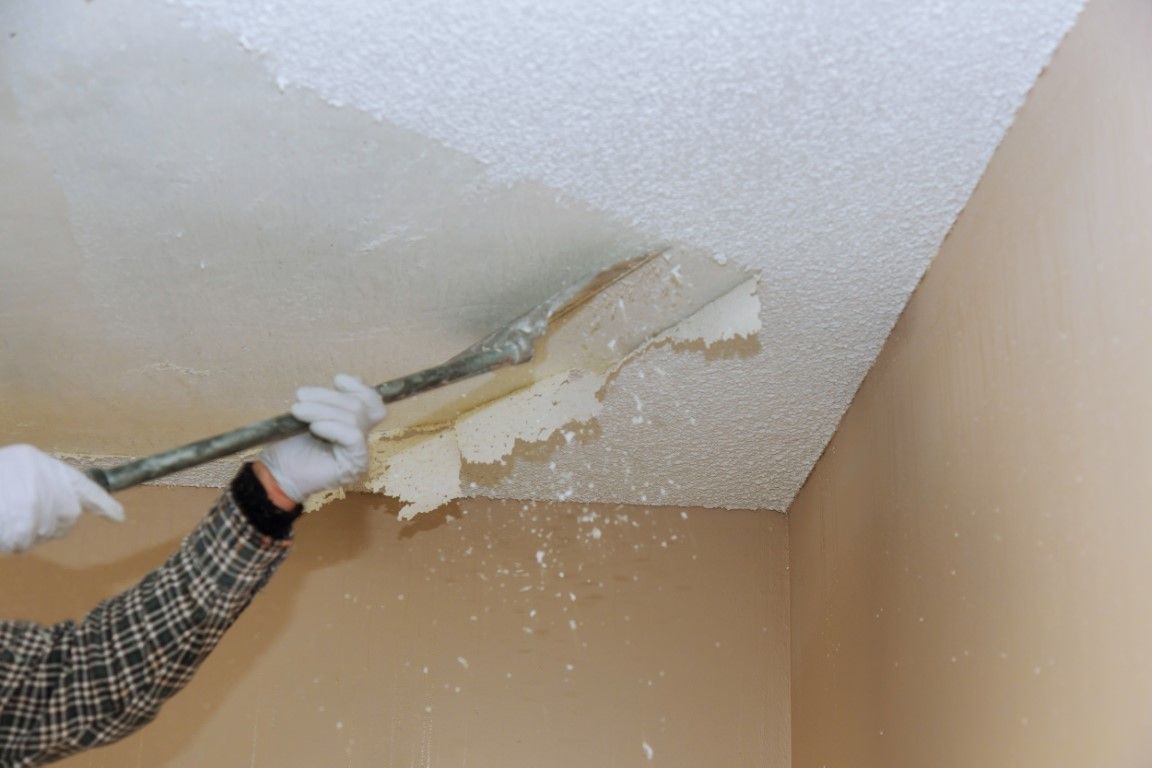
3. How do you prepare for popcorn removal?
Preparing for popcorn ceiling removal can be a time-consuming and labor-intensive task. Not only do you need to plan ahead and gather the right tools and materials, but it's also important to ensure proper safety protocols are followed. In this guide, we’ll walk you through all the steps of popcorn ceiling removal and help you prepare for a successful project.
Before beginning your popcorn ceiling removal endeavor, there are several important steps to consider:
- Test for Asbestos: Popcorn ceilings were made with asbestos in some older homes and this material can be hazardous if disturbed without taking proper precautions. It is best to contact a professional testing service if you suspect your ceilings contain asbestos before attempting any popcorn ceiling removal yourself.
- Gather Materials: Once you know it is safe to proceed with removal, gather all the necessary supplies such as goggles, gloves, paint scrapers and much more. Be sure to check over all these materials prior to starting to ensure everything is in working condition.
- Clear & Cover Floors: Create a clean workspace by removing furniture from the room or covering it with a tarp or plastic sheeting to prevent any damage from water or messes during the process. Additionally, cover floors with drop cloths or painter’s tape in order to protect them from any debris or over-spray that might occur during the work.
- Patch Holes: Before starting any scraping or other removal techniques, patch up any holes that may be in your drywall from nails or screws using drywall mud and sandpaper for smoothness after drying (about 24 hours). This will help keep dust from spreading throughout your home during the process and improve aesthetics when finished!.
By following each of these steps carefully, you'll be well prepared for popcorn ceiling removal and can successfully tackle this project like an expert!
popcorn ceiling removal
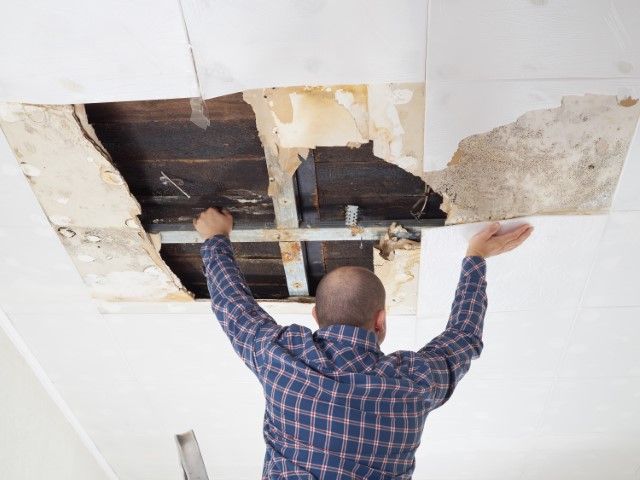
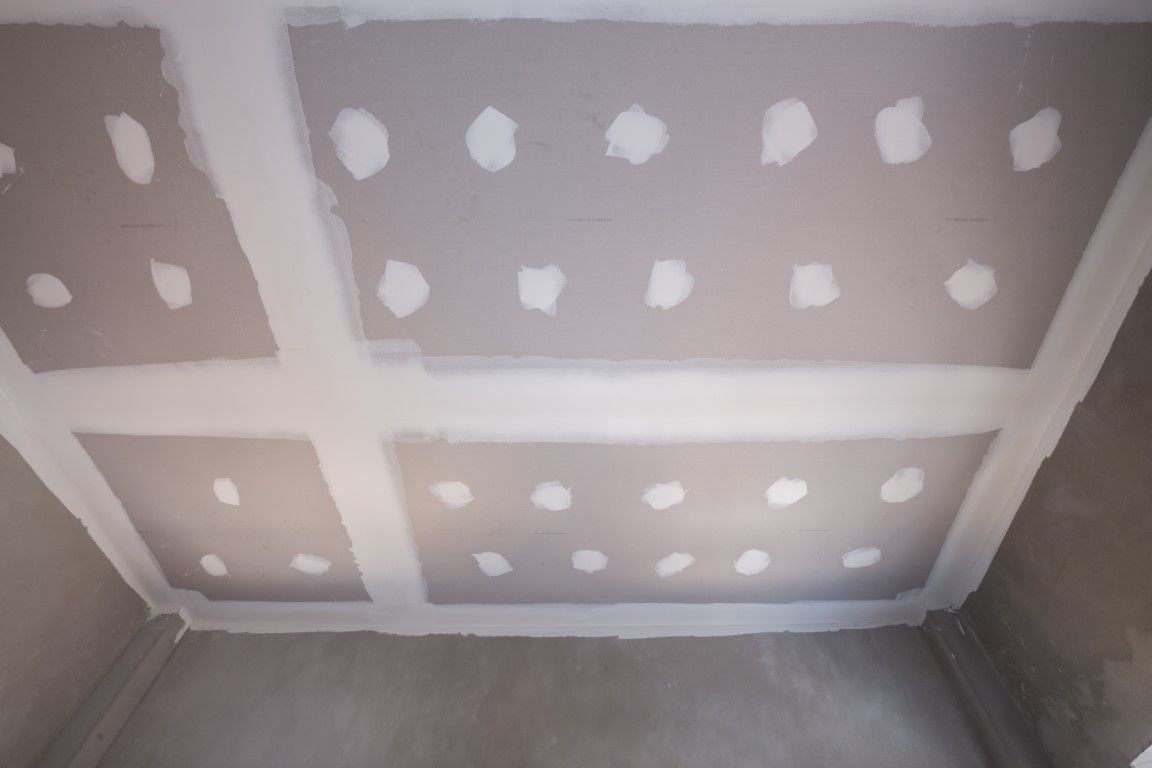
4. What are the steps after removing popcorn ceiling?
Preparing the area correctly and following the right steps is essential in achieving an attractive finish. Here’s a guide on what to do after removing popcorn ceilings so you can get the best possible outcome.
The first step is to rough up the surface of your ceiling. This will help ensure paint or other new textures adhere properly to the drywall. You can use sandpaper or a sander to smooth out any bumps caused by staples, screws or nails that were used to hold up your existing texture material.
After that, it's time to clean up! Vacuum or sweep away any dust and debris from the ceiling as best you can before wiping it down with a damp cloth. This will make sure no particles are left behind before applying new textures or paint.
Finally, repair any imperfections such as holes in the drywall. You may need to use joint compound for larger cracks and dings or even apply additional pieces of drywall if needed. Sand these areas when repair work is complete and then you're ready for priming and painting! Choose a color that complements your home's existing design and enjoy your refreshed look.
Following these steps after removing popcorn ceilings can help ensure that you get a great looking finished product that will last for years to come!
Ceiling repair
5. If I want to hire someone, how long does it take a professional to remove popcorn ceiling in Melbourne, FL?
When homeowners decide to remove popcorn ceilings from their homes, the first question that often comes up is how long it will take a professional to do the job. The answer depends on several factors including size of the area, condition of existing texture material, and types of products used during removal.
On average, a popcorn ceiling removal professional in MElbourne, FL should be able to complete the task in 1-2 days. If you have a small ceiling with minimal dust or debris, then it could potentially be done in one day. Larger areas with more damage may require additional time to ensure all popcorn textures are removed and ceiling is clean before applying new paint or materials.
It's important to note that some contractors may add additional services such as cleaning up any dust or debris caused by removal, patching any holes left behind, and even painting the ceiling once popcorn textures are gone. These services can often add an extra day or two onto the project timeline depending on how much work needs to be done.
Overall, hiring a professional for your popcorn ceiling removal project can save you time and stress of taking on this project yourself! It's best to check with local contractors in order to get an accurate estimate for how long it will take them to complete the job.
6. Do most popcorn ceilings have asbestos?
Popcorn ceilings, also called acoustic or stucco ceilings, were popular in homes built between the 1940s and mid-1980s. During this time period, asbestos was commonly used in ceiling textures as a fire-retardant material. As such, many people are concerned that their popcorn ceilings may contain this potentially hazardous substance.
The truth is that not all popcorn ceilings have asbestos in them. Asbestos was only one of several types of ingredients used to make ceiling texture mixtures during this era. To determine if your popcorn ceiling contains asbestos, you'll need to have it tested by a professional who can perform an analysis on the material and provide detailed results.
If your popcorn ceiling does contain asbestos, then it's important to take proper safety precautions when removing or working around this material. This means wearing protective gear such as gloves and masks and not disturbing any existing texture until it has been professionally removed or sealed off from the rest of the home.
Overall, while most popcorn ceilings do not contain asbestos, it’s still important to be aware that there may be a risk involved before starting a removal project yourself. Having your ceiling tested is always recommended before taking any further steps towards updating your home with new textures or paint finishes!
In conclusion
Removing popcorn ceilings is a great way to freshen up the look of your home and make it more modern. But, before you start the project, it's important to understand the time you'll need to finish and prepare the space correctly - from sanding and cleaning the ceiling to patching any imperfections. Hiring a professional in Melbourne, FL for this job can save you time and stress in the long run as they have the tools and expertise to get everything done quickly and efficiently. With careful planning and proper execution, you'll have a beautiful new ceiling in no time!